A collection of Computer Hardware, Software and other IT Tutorials

Friday, November 25, 2022

Restoring the Default Fonts in Windows 7 and Remove Custom Fonts

Hello Everyone, today we would like to share you about restoring Windows 7 default font (Original Font). The default font can accidentally deleted or override by other font software. In this case you can easily restore the default font. Please check the following instructions.


Download and Install the following default font


>> How to restore the default fonts in Windows 7? 

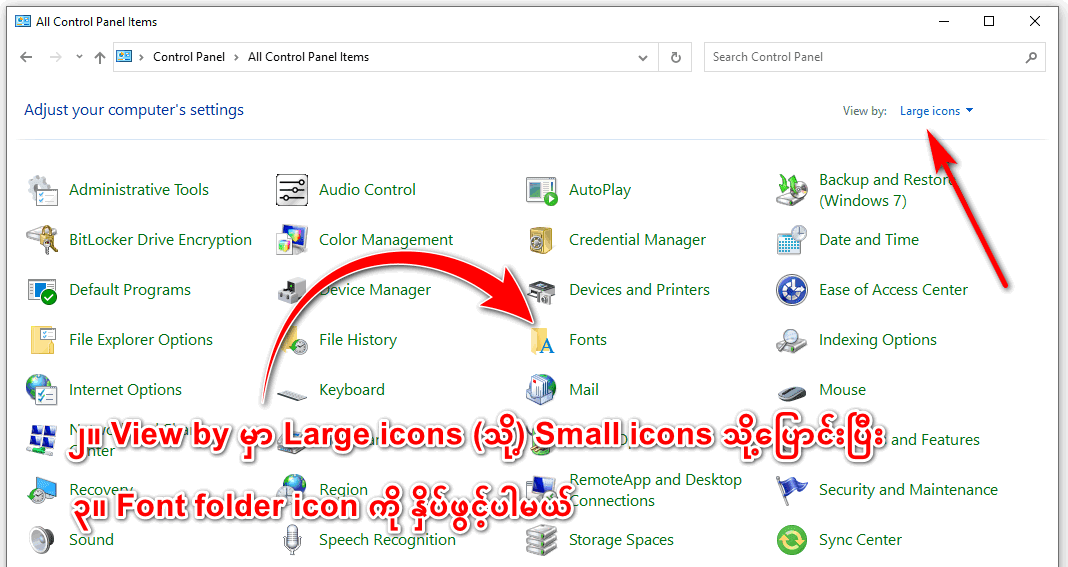
1. Click on START MENU and Select CONTROL PANEL


2. Switch the view of the Control Panel to "VIEW BY LARGE ICONS"

3. Then click on FONTS folder icon


4. Click on FONT SETTINGS


5. Click on RESTORE DEFAULT FONT SETTINGS
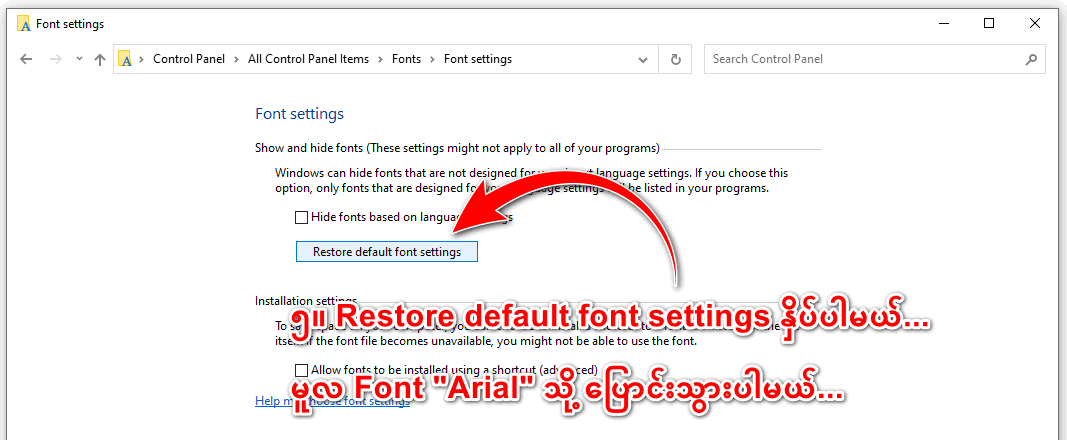

DONE!


Share:

0 comments:

Post a Comment

Translate Website to your language

Blog Archive

Featured Post

VLC media player free, simple, fast and powerful software free download

VLC is a free, simple, fast and powerful software and open source cross-platform multimedia player and framework that plays most multimedia...

Total Pageviews